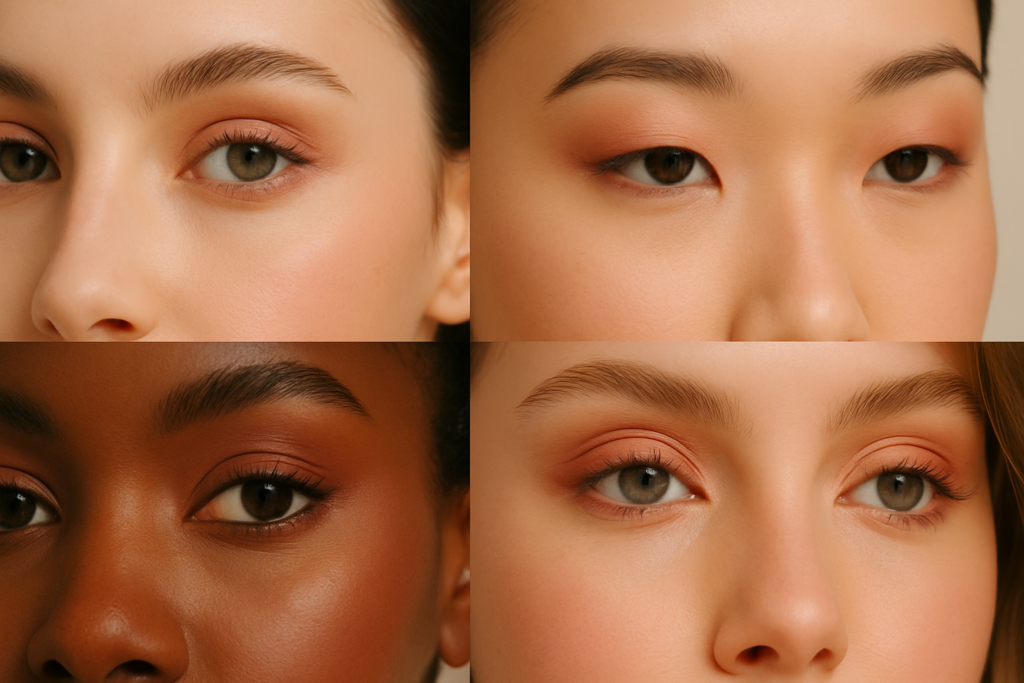
Most eye makeup tutorials teach you one technique and expect you to apply it to your face. That’s why so much eye makeup advice fails — it ignores the most important variable, which is the actual shape and structure of your eye.
Working makeup artists don’t memorise looks. They learn to read eye shape, then adjust placement accordingly. The result is eye makeup that flatters the specific face in front of them, not eye makeup that flatters a YouTube influencer.
Here’s the system, by eye shape.
How to identify your eye shape
Stand in front of a mirror in good lighting. Look straight ahead. Then:
1. Is there a visible crease when your eyes are open?
- Yes, fully visible crease = standard or almond
- Yes, partially hidden by the upper lid = hooded
- No visible crease = monolid
2. Where does the outer corner sit?
- Slightly upward from the inner corner = standard
- Even with the inner corner = round
- Slightly downward from the inner corner = downturned
3. How big does the eye appear relative to your face?
- Average proportion = standard
- Wider than average = round
- Narrower with longer length = almond
4. Is there visible white above and below the iris when looking straight?
- White visible all around = prominent or “bug” eyes
- White below the iris only = deep-set
Most people have a combination — for example, hooded almond, or round downturned. Work with the dominant features first.
Hooded eyes (the most common issue, and most misunderstood)
A hooded eye is one where the upper eyelid is partially covered by skin from the brow bone. When you open your eye, you see less of the eyeshadow you applied because the hood swallows it.
The traditional “smoky eye” tutorial fails on hooded eyes because the shadow disappears into the hood. You apply, you look, the work is invisible.
The pro technique for hooded eyes:
1. Place the dark shadow ABOVE the natural crease, not in it. The natural crease is hidden when your eye is open. The “false crease” — about 5mm above where the natural crease sits — is what shows. This is the single most important adjustment.
2. Extend the shadow upward and outward, not into the inner corner. A flick or wing of shadow at the outer corner, traveling slightly upward, opens the eye visually. Anything close to the inner corner closes the eye.
3. Skip the lower lash line. Heavy shadow under the eye on hooded eyes makes the eye look smaller and tired. Use only a thin shimmer in the inner third of the lower lash line, no liner across the whole bottom.
4. Curl lashes aggressively. Hooded eyes benefit from dramatic lash curl because the lashes need to lift above the hood line. Heated lash curlers are worth the €15 investment.
5. Liner should be thin or tightlined. A bold winged liner gets swallowed by the hood. Either tightline (between the lashes, invisible from above) or do a very thin upward-flicking line that ends above where the hood folds.
Standard / almond eyes (the lucky ones)
A standard or almond eye is what most makeup tutorials assume. The crease is visible, the eye is proportional, the outer corner lifts upward.
Most eye makeup techniques work on this shape with no adjustment. The only thing to watch: don’t over-darken the outer corner, as it’ll close an already-balanced eye.
Round eyes (over-prominent)
Round eyes are wide-set and large, with significant white showing around the iris. The instinct is often to make them look “bigger” with bright techniques — that’s wrong. Round eyes already look big. The work is to add length and slight definition without exaggerating.
The pro technique:
1. Extend shadow horizontally, not vertically. Take colour out toward the temple in a horizontal sweep, rather than building up into the brow bone.
2. Wing your liner. A small wing at the outer corner lengthens the eye, balancing its roundness.
3. Use medium-depth shadows, not extremes. Bright shimmery shadows make round eyes look surprised. Medium taupes, mauves, and warm browns work best.
4. Darken the outer third of the lower lash line. This is one shape where lower-lash-line work helps — but only the outer third, fading inward.
Learn this from Paula Callan
30 years training celebrity makeup artists. 7 hours of video tutorials, lifetime access, 60-day money-back guarantee. €149.
Downturned eyes (the outer corner droops)
A downturned eye has an outer corner that points slightly downward. Untreated, this can make the face look tired or sad even when the rest of the makeup is good.
The pro technique:
1. Lift the outer corner with shadow. Build a small shadow triangle that pushes UP from the outer corner, not down. This is the opposite of what tutorials typically show.
2. Wing liner upward sharply. A more pronounced upward flick than you’d use for standard eyes. The angle of the wing should clearly point upward, not extend straight out.
3. Avoid heavy lower lash line. Anything heavy underneath emphasises the downturn. Keep lower work minimal and only at the outer corner.
4. Curl and lengthen lashes. Long, curled lashes draw the eye upward, distracting from the corner.
Monolids (no visible crease)
Monolid eyes have a smooth upper lid without a defined crease. Standard eye tutorials don’t translate because they rely on the crease as a structural anchor.
The pro technique:
1. Build placement based on the eye opening itself. Apply darker shadow along the lash line and gradually fade upward and outward. The placement is determined by what shows when the eye is open, not by where a crease would be.
2. Eyeliner is your structural friend. A tightlined upper waterline plus a slight upper lash line definition creates the depth that a crease provides on other eye shapes.
3. Lashes lift everything. Long mascara and (often) strip lashes give the dimension that other shapes get from contouring shadow.
4. The Asian beauty community has solved this best. Wayne Goss has good content on monolid makeup specifically. Most Western tutorials handle it poorly.
Deep-set eyes
Deep-set eyes sit further back in the socket, creating natural shadow above them. The pro technique here is the opposite of most tutorials: use LIGHTER shadows, not darker, on the brow bone area to push the eye forward visually.
Pro adjustments:
- Soft shimmer on the brow bone (not below, not on the lid)
- Avoid dark shadows in the crease — there’s already shadow there from the bone structure
- Apply medium tones on the lid, lighter at the brow bone
- Keep liner medium thickness, not heavy
Prominent eyes (the iris pushes forward)
Prominent eyes have a slight forward push of the iris. They benefit from techniques that recess the eye slightly — the opposite of deep-set treatment.
Pro adjustments:
- Use medium-to-dark shadows across the entire lid
- Avoid shimmery shadows on the centre of the lid (they push the eye forward more)
- Heavier shadow at the crease and outer corner
- Medium-to-heavy liner
What changes for working artists
If you’re applying eye makeup to clients rather than yourself, the eye-shape reading becomes the most important skill of the entire makeup application. Working artists assess eye shape in the first 30 seconds of a consultation, before they pick up any product.
The reading process for a client:
1. Have them look straight ahead
2. Identify the visible crease (or absence)
3. Check the outer corner direction
4. Note the prominence (deep-set vs forward)
5. Decide placement before opening the palette
This is the kind of skill that separates technically-correct makeup from professionally-correct makeup. The shadow can be perfectly blended, the colours perfectly chosen — but if the placement doesn’t suit the eye shape, the work won’t flatter the face.
Get the Becoming a Makeup Artist guide
The honest career roadmap — training options, realistic timelines, first-kit budgets, and how to know if this path is right for you.
The summary table
If you only remember one thing per eye shape, remember this:
- Hooded: Place shadow ABOVE the natural crease
- Round: Extend horizontally, not vertically
- Downturned: Lift the outer corner
- Monolid: Use liner as your structure
- Deep-set: Light on the brow bone
- Prominent: Medium-to-dark across the lid
- Standard/almond: Most techniques work as-is
The bottom line
Most eye makeup tutorials are wrong for most eye shapes. The technique that works on the influencer doesn’t work on you because the placement isn’t being adjusted for your eye structure. This is the single most fixable problem in consumer eye makeup, and the single most important skill for aspiring artists.
The work of learning is to figure out your own eye shape (or several, if you’re doing client work) and start placing product accordingly. Once you’ve done it deliberately three or four times, it becomes intuitive.
If you want the full system taught properly, with demonstrations on multiple eye shapes, the eye structure module in the Paula Callan Masterclass is one of the strongest in any online course I’ve seen. The placement principles transfer directly whether you’re working on your own eyes or a client’s.